Showing posts with label sewing. Show all posts

Monday, April 18, 2016

Ironing Board Cover Tutorial

Excited to share with you guys that we are having our second child !
We are expecting the baby to arrive on April 30th. Thats the EDD.
Richu is very excited about the new kiddo. He's been stocking up thing for his little baby.
We visited a shoe store the other day, rather than looking for a shoes for himself, he came back holding a tiny pair of shoes for the baby. I absolutely adore Richu when he does such little gestures :)

So now that I have loads of time in my hand, I have turned to doing some stuff that have been in my mind for some time now.  The ironing board sitting in our bedroom is not a pretty sight. It desperately needed a new cover. That should be evident from the picture i guess. :)


Yikess ... this is really embarrassing right !!
Now after the brand new cover, its definitely better !

ironing board cover


I scourged around the internet on how to make one, and it turns out that its incredibly simple to create one yourself with some left over fabric.
I absolutely love these simple and easy DIY's that can make so much difference to everyday stuff and cost absolutely nothing !
You could do with some left over fabric, but I got some rally good fabric at a bargain price from the shop the other day and decided to use that.

All you need is some:
 - Fabric
 - Scissors
 - Elastic

You dont have to be precise in your measurements, this is perfect project for beginners.
Ok so now to the steps.

Step 1:  Grab your fabric. place your ironing board on it.
Step 2:  Cut the fabric leaving atleast 4 inches across the perimeter.


Step 3 : Place the elastic at the edge, fold the fabric over and stich stich stich all the way.

Check this video by Niler if you want to see the detailed steps. Here she has used batting, which I skipped.

Your brand new cover should be ready in 15 mins max !


Enjoy !



Tuesday, July 16, 2013

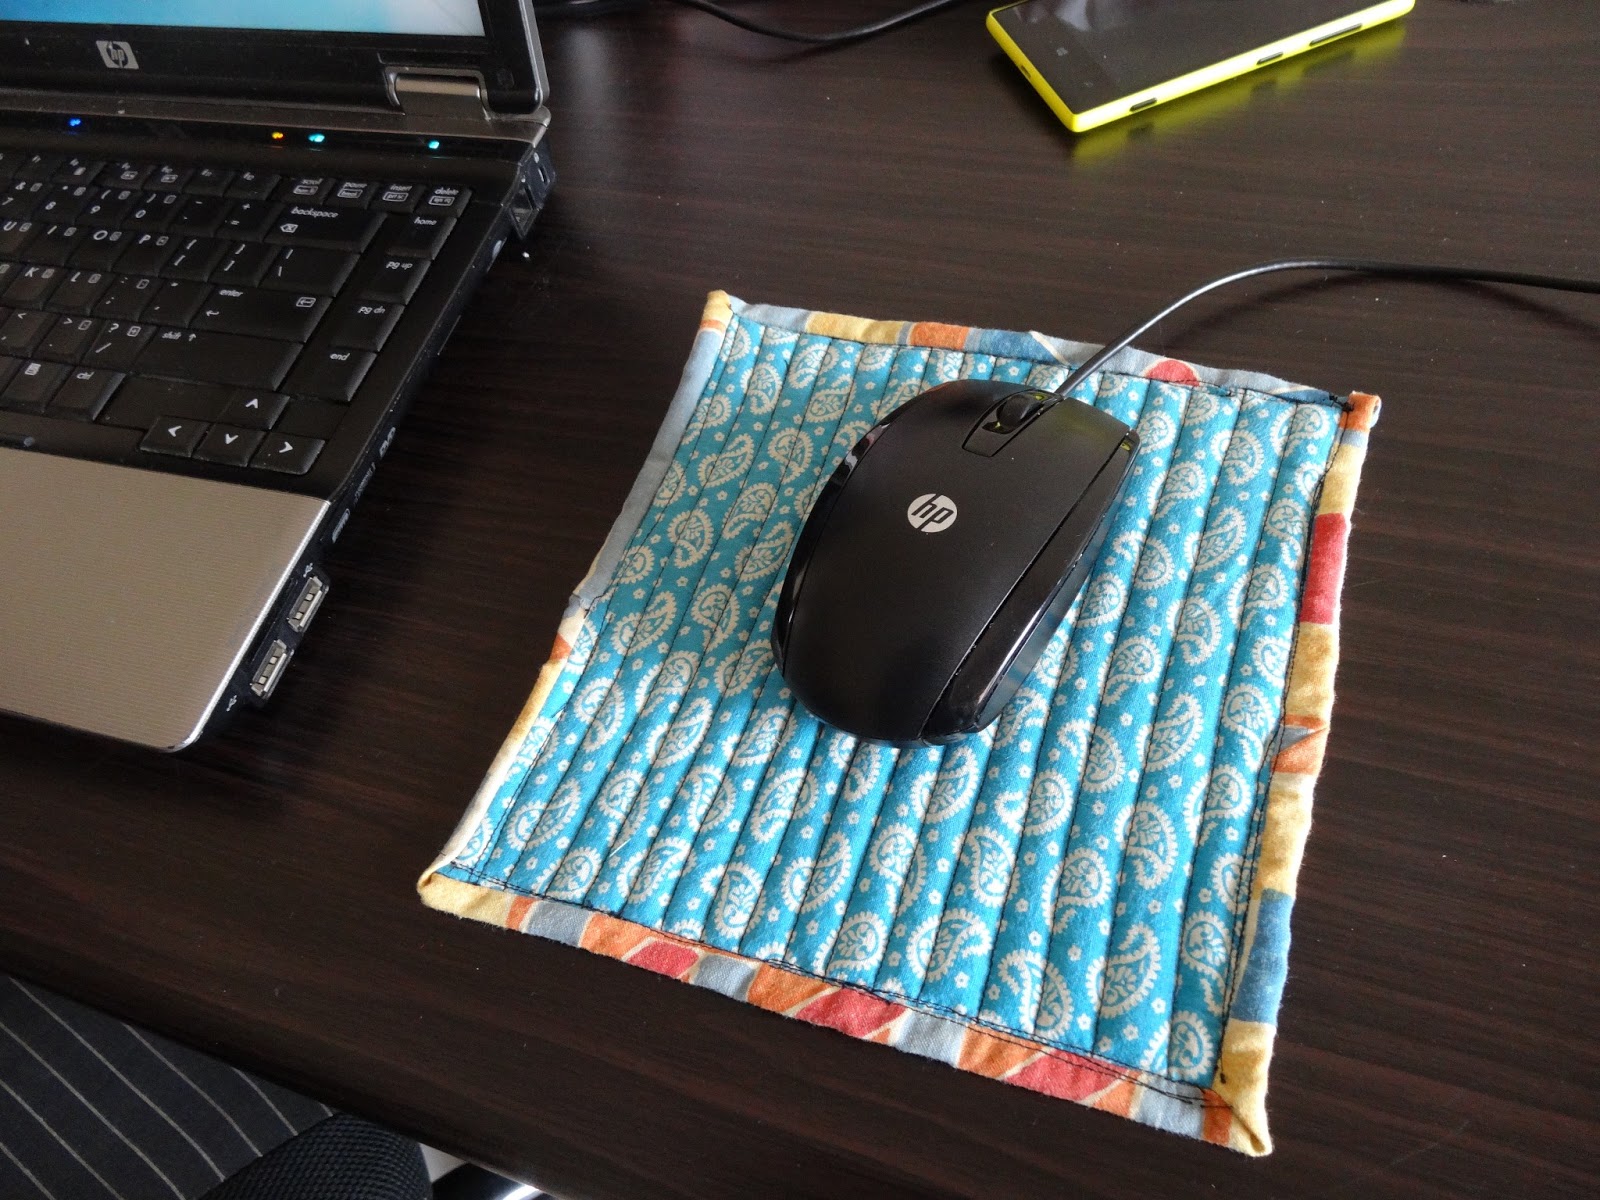
Mouse Pad from fabric scraps

When you have fabric scraps lying around, the best way to make use of them if trying out things you have never done before. I did that today. I utilized it to try three things I have never done before - straight line quilting, free motion quilting and fabric painting.

So this is the first one.


Nice one right. But yes I know I have fallen back really bad on the binding end. Yes I need to master that.
Problem with that is it requires patience... ;)


Now onto the next one. This is the one where I tried my hand at fabric painting.


Tried some freemotion quilting. But this was a failure. I know it looks pathetic. So i started using it as a hot-pad.
\
Lesson 1: If you plan to make a mouse pad, go ahead with straight line quilting. Its smoother and more comfortable to use. Free motion quilted one was a no- no (Certified by dear hubby)

Lesson 2 : Be patient while doing the binding. :(

What have you been up to lately???
Happy Crafting !

Connect with me in Facebook, Bloglovin, GooglePlus . Buttons are there in the right sidebar.

Tuesday, July 9, 2013

Gym Bag from Tshirt

My Husband has again decided to go to the Gym. I am keeping my finger crossed that he sticks to his plan this time around. All the other times he enthusiastically goes to the gym, pays loads to money (generally he opts only for 1 year memberships :( )....  and then NEVER GOES !!! I am sure the gym people adore him for that. Every year a mystery guys drops by their gym, pays for a year's membership and never comes back! Have you seen that cool guy ...hahhaaa....

Well so the other day we visited some gyms around our area. He particularly liked a gym very much. I haven't seen him so excited before. He packed his stuff into a plastic cover the day before itself. But then I noticed he was putting his stuff into a Plastic Cover. That's uncool isn't it !
So I decide to make a bag for him. I have never made anything for him before. So this was the perfect time to show some husband love.
I first asked for his opinion about the kind of bag he needs. Ran some searches in the internet. Surfed through pinterest. Finally stumbled upon something pretty.
It was a simple drawstring bag made by Amanda. Check out the tutorial here . It was a smaller version. I made a bigger version and again I decided to cut open one of his T-shirts to get the job done ! :)

I loved one particular TShirt. It had a nice color. So decided to go ahead with it and here is the final product.

Tshirt Gym Bag

Isnt it nice. And the best part is it was sooo easy to make. It took less than half an hour to get the job done.
And when you are using a Tshirt you can do away with measuring and cutting fabric.

Gym bag DIY

I took these pics just before he was hopping off to office.... And the funny part is he didn't go to the gym that day too !! I hope my effort doesn't go wasted... :(

Gym bag from Tshirt

That small label u see in the middle is something i nicked from another Tshirt :)

DIY Gym bag

I love the simplicity of the whole project. Small ties at the bottom to hold the cords together.

Drop a comment as to what you think.
Connect via facebook, blogolvin ,googlePlus or get new posts in your inbox. Buttons are in the right sidebar.

Tuesday, July 2, 2013

Sewing Machine cover with applique

Hi All... I just finished my first ever applique... I know there are certain problems with it... but yet i am happy.
I sewed a sewing machine cover...nothing fancy... just a small piece of cloth hemmed at the edges. A slit at the top to allow entry for the tread spool. and just 2 quick stiches at the top corners for a boxy look.
This is how it turned up...

Basically the cover was just an excuse to try out an applique...


But I guess my son had a better idea :)


Dont forget to leave u lovely comments and stay connected through social media.
You can find the button in the right side bar .

Have you seen my other sewing cover which I made using a pillow cover. Check it out here.


Saturday, March 9, 2013

Back Pillow from a Tshirt

My Husband got a gift coupon the other day. So we went to the shopping mall near  our house. He told me to spend it ...so I decide to get myself a top or something. We reached the shop...went through the entire clothing section... but i simply didnt like any of the tops or dresses they had on display... Then I though it was time to show some husband Love... :) and decided to pick something for my hubby... That too didn't work out...
 Now I was desperate to spend money and started picking up all sorts of things which probably were of no particular use... :)
In the home decor section I came across some nice cushion... one with ties... It struck a bell in my head... yeah this could be perfect for the dining table chair... But we looked at the price it was too pricey .. That's when he said...  You can make that urself cant you... then why buy... So like Barney says in "How I Met Your Mother" ... I said 'Challenge Accepted !!' ha haaa...
So we finally ended up buying nothing and headed back home... Isn't it amazing how when we really have to buy something... we never like anything. This is not the first time this has happened to me... What about you?? Have you had some similar experience??

Well so this is what I came up with.

Sew a cushion from a Tshirt


I love my dining area... This space is always so lighted... I particularly like to sit in the morning and have those lovely early morning chats with my husband...when he reads the paper and we discuss all sorts of things. From day to day house hold things to politics to gossip :)

And whenever I sit in that chair.. I always end up getting cursing the chair. It has a wooden back and i am not very comfortable slouching back in it.

Well this cushion now makes my early morning chats a more happier ones :)

Tshirt pillow

Tie up the cute little ties to the chair like this ...

Easy Pillow

My naughty little Richu loved the cushion... he was busy dragging it around the house... throwing it around and was having a good time with it... He's run around soo fast in the house...thats it difficult to capture him on camera... haha... this is the best I could manage ;)


The cushion in full glory !

Pillow with ties

It was pretty simple to make .Less than an hour is all that you need. Made this when my little naughty monster was having having one of his afternoon naps :)
And things needed are also nothing much - A tshirt, some cotton and few buttons for embellishment.
I made this cushion out of my husbands old tshirt.
First pick your tshirt and snip it off right below the arm pit.
Now since 2 sides of the tshirt are already sewed, it makes your life simpler. You now just need to sew the other two sides. But before that you need to make the ties.
You can make them using a separate cloth or some excess tshirt material. But I didn't bother to do that... coz that means extra sewing rit. :)
What I did was... I just snipped of the bottom seam of the tshirt. They generally fold the bottom end of the tshirt and sew right... Yes that part...
I carefully snipped it with my scissors. So I had two pieces. Now I aligned both of them together and cut right at the center again. So I ended up with 4 pieces for my ties.

Now I turned my tshirt wrong side out. Sandwiched the ties between the tshirt pieces. The ties must be inside. only a small part needs to lie out. Now pin and sew.
Repeat the same for the other side.
Leave a small opening at the end. Turn the cushion inside out.

Fill Cotton. Slip stitch the opening close. Sew some nice buttons on your cushion... And your done !!!


Follow my blog with Bloglovin

Thursday, September 13, 2012

Easy Organization Board

I have always lived an unorganized life.Unlike the rest of the gals in college, school and work I dunno I simply didn't have the innate capability in me to keep things in the right place. I remember how Papa used to come around my room once in a while just to see if I kept things neatly...and once it so happened that just before papa was coming to check my room ...I grabbed everything lying around and stuffed it inside my cupboard. And when Papa came, the room looked fine.Just on an instinct he opened my cupboard... and looo... all the cloths, things stuffed in pored out like a waterfall...hahhaaaa..... I really got some good amount of scolding that...  Thinking back it all seems so funny :)

Things have changed... changed soo dramatically after Rihan was born. I think he changed my DNA on his way out ...hahhaa.... I have become those organization crazy female these days. From the time I get up... I am simply thinking about how to make my life more organized. Whats the best place for each item. I started off with my Kitchen...since Its the place I dont like to be... But I have got to be there always. So I thought a little organization mit actually lift up my spirits to cook. But I must tell u ...it worked like magic. Once I got my Kitchen organized.. I feel more interested in cooking ... Coz the place is always tidy and organizzzeedd. In fact this week  I made a Menu plan for the entire week and almost stuck with it. My hubby is pretty happy with my organization craze... Of course he is !! he gets to eat good things and too on time ! :)

So as a part of this new interest I decided I needed a central organization board to hold my most frequently used bills - electricity, cable, paper, Food coups etc... Also pin up TO-DO lists, Menu Lists etc. I needed some thing on which I could pin up things, also have pockets too. Went online and searched for some ideas. Hit on a jackpot in Sew4home site. I liked the design and made one myself. Didn't follow the steps though. Just made one similar to that. and look how it looks... I'm in love with it !

Organization Board

Can Pin up my important bills and TODO list on some sections

Pin Up Board DIY

Many Tiny pockets to hold up my bills , accessories and pins

pin up board

 Ribbons that support my pics.
DIY PIN UP BOARD

He looks lovely isn't he... That's the pic I took when I he had his first bubble bath.

And lot of tiny pockets in the bottom
easy pin up board
A small handwritten label I wrote and stuck it to the bottom.


And the whole project hardly took an hour to complete.
The base is thermocol. I wrapped up the cloth over the thermocol. you could use a single piece of cloth to wrap it up or join different pieces of fabrics to make the block pattern like the one I have made. To make the bottom pockets I attached the long strip pf fabric and stitched them at the 3 sides. later on you can sew ribbons at the intersections. It serves two purposes :
1) Gives the whole thing a cleaner and better look
 2) hides all the imperfections of sewing ;)

Finally wrap the entire fabric over the thermocol and stick duct tape to secure the fabric !

Finally stick Velcro dots behind the board to secure it to the wall !

Easy and simple isn't it. Let me know your commentss... I lovve loveee them ! :)

Thursday, August 9, 2012

My First Quilted Playmat

All this while I was working on my mothers sewing machine. Finally I brought one for myself 3 days ago. And I started sewing the same day. I spend the morning hunting for some fabrics. Strolled the streets of marthahalli looking for fabrics. Finally after like 2 hrs of search I laid hands on some nice polka dot fabrics. Fell in love with them and brough them. The idea of creating a quilt was now starting to become a reality.


Started cutting the pieces. Initially thought I'll make a simple block quilt. Then finally I made some small changes and ended up making this

Baby play mat

Its not a quilt... instead i made a play mat... primarily because finding batting is kind of very difficult around here. I did go to commercial street .... walked up and down but couldn't find batting. Finally I got some foam ... so well I decided to make a play mat instead. I am pretty happy with the end result.... What do you think ??

how to make a baby playmat


Wednesday, May 30, 2012

Pillow Case to Sewing Machine Cover

Today I'll be sharing with you the story of how an old pillowcase cover turned into a sewing machine cover which will protect my sewing machine from all the dust.

Pillowcase sewing machine cover

It's just another example of how a virtually useless item can turn into something beautiful. I found an pillowcase in my stash. It was old and I just couldn't think if anything to make out of it. That's when I thought I could just try out a few things on it that I have never done before.
Like making Fabric flowers.
 I saw these fabric flowers in MakeIt-LoveIt and decided to do that. Ashely has explained it very well. Cut out circular pieces of cloth. For 1 flower you'll need 4 circular pieces of the same size. Fold each of these circles into a cone and squeeze in the centre. Thus U'll have a smaller and bigger circle. Similarly make the rest of the petals. As you do these, pin them on the fabric to make the flower. stitch concentric circles or spiral to secure them in place.


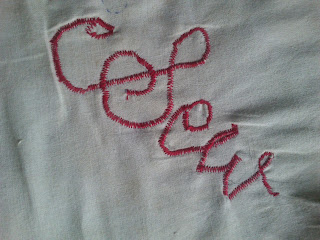
Yet another day I wondered if embroidery could be done with an ordinary machine. I observed a few cloths and saw they were mostly zig zag stiches. So I set my machine to a stitch length of 2 . Wrote the word "Sew" on the fabric and ran a zig zag over it.


Once I finished this I realised it could become a good sewing machine cover. Decided to make use of the decorative stitches on my machine to give it a simple border


Then I placed it over mine machine and marked the places where the thread poles lie. Cut out 2 circles , so that the thread can remain in place when I cover my machine and loo... Machine cover ready !

Isn't it amazing how simple things can virtually change a useless scrap of fabric to something useful !


Follow my blog with Bloglovin

Saturday, April 14, 2012

Diaper Bag - My First Major Project

       Hi guys... I am back with yet another project... This time a more complicated one - A Diaper Bag. This was the first time I spend more than 4 hours to sew something. In fact this time was spread across 2 days. The first day I was making calculations... How big I would need my bag to be... The length of cloth required... searching all my stash to find a suitable fabric that wouldn't fray and is sturdy. I was running short of the sponge (ideally I should have used batting) that I was going to sandwich between the fabrics. So I needed to account for that too to come up with a suitable size bag which would be big enough to carry my baby items when I go out for a small trip. And this was the final product !


       I know its not a great looking fabric. I made this out of a old bedspread. Since this is the first time I am making a bag... I decided to go for a less fancier material. Experiment till you get it right and then tear apart brand new fabrics... That's my Motto ! :)

My Notes , Calculations..
OK Now about the bag. I fitted Velcro in the main flap. Like this. also the front part, I kind of did a quilt like design. Its not visible here.... I should have chosen a more contrasting thread 


It also has a back flap...


The inside of the bag has small compartment attached to the wall to store bottles, diapers .  I threaded an elastic on the top of the compartment to keep things in place


Ill probably post the steps next time I make a better one. As I said to was just an experiment. Do let me know your thoughts.


Related Posts Plugin for WordPress, Blogger...