Thursday, September 13, 2012

Easy Organization Board

I have always lived an unorganized life.Unlike the rest of the gals in college, school and work I dunno I simply didn't have the innate capability in me to keep things in the right place. I remember how Papa used to come around my room once in a while just to see if I kept things neatly...and once it so happened that just before papa was coming to check my room ...I grabbed everything lying around and stuffed it inside my cupboard. And when Papa came, the room looked fine.Just on an instinct he opened my cupboard... and looo... all the cloths, things stuffed in pored out like a waterfall...hahhaaaa..... I really got some good amount of scolding that...  Thinking back it all seems so funny :)

Things have changed... changed soo dramatically after Rihan was born. I think he changed my DNA on his way out ...hahhaa.... I have become those organization crazy female these days. From the time I get up... I am simply thinking about how to make my life more organized. Whats the best place for each item. I started off with my Kitchen...since Its the place I dont like to be... But I have got to be there always. So I thought a little organization mit actually lift up my spirits to cook. But I must tell u ...it worked like magic. Once I got my Kitchen organized.. I feel more interested in cooking ... Coz the place is always tidy and organizzzeedd. In fact this week  I made a Menu plan for the entire week and almost stuck with it. My hubby is pretty happy with my organization craze... Of course he is !! he gets to eat good things and too on time ! :)

So as a part of this new interest I decided I needed a central organization board to hold my most frequently used bills - electricity, cable, paper, Food coups etc... Also pin up TO-DO lists, Menu Lists etc. I needed some thing on which I could pin up things, also have pockets too. Went online and searched for some ideas. Hit on a jackpot in Sew4home site. I liked the design and made one myself. Didn't follow the steps though. Just made one similar to that. and look how it looks... I'm in love with it !

Organization Board

Can Pin up my important bills and TODO list on some sections

Pin Up Board DIY

Many Tiny pockets to hold up my bills , accessories and pins

pin up board

 Ribbons that support my pics.
DIY PIN UP BOARD

He looks lovely isn't he... That's the pic I took when I he had his first bubble bath.

And lot of tiny pockets in the bottom
easy pin up board
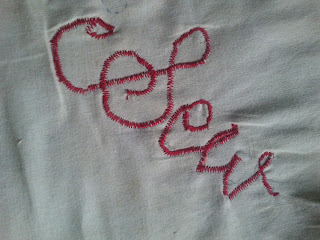
A small handwritten label I wrote and stuck it to the bottom.


And the whole project hardly took an hour to complete.
The base is thermocol. I wrapped up the cloth over the thermocol. you could use a single piece of cloth to wrap it up or join different pieces of fabrics to make the block pattern like the one I have made. To make the bottom pockets I attached the long strip pf fabric and stitched them at the 3 sides. later on you can sew ribbons at the intersections. It serves two purposes :
1) Gives the whole thing a cleaner and better look
 2) hides all the imperfections of sewing ;)

Finally wrap the entire fabric over the thermocol and stick duct tape to secure the fabric !

Finally stick Velcro dots behind the board to secure it to the wall !

Easy and simple isn't it. Let me know your commentss... I lovve loveee them ! :)

Thursday, August 9, 2012

My First Quilted Playmat

All this while I was working on my mothers sewing machine. Finally I brought one for myself 3 days ago. And I started sewing the same day. I spend the morning hunting for some fabrics. Strolled the streets of marthahalli looking for fabrics. Finally after like 2 hrs of search I laid hands on some nice polka dot fabrics. Fell in love with them and brough them. The idea of creating a quilt was now starting to become a reality.


Started cutting the pieces. Initially thought I'll make a simple block quilt. Then finally I made some small changes and ended up making this

Baby play mat

Its not a quilt... instead i made a play mat... primarily because finding batting is kind of very difficult around here. I did go to commercial street .... walked up and down but couldn't find batting. Finally I got some foam ... so well I decided to make a play mat instead. I am pretty happy with the end result.... What do you think ??

how to make a baby playmat


Thursday, July 19, 2012

A Journey of a Canvas

Yeah I know a weird title.... A journey of a canvas and that's exactly what I am going to share with you today. I had an unfinished painting at home for almost an year now. I started off very excited about painting this new idea I had in mind... But somehow did'nt materialize the way I wanted it to be. It was basically a bunch of flowers in a jug sitting by the window. Everything came up well except for the jug of water. It looked awkward... I kept trying and It didn't come out well... Finally after one year... I decided I had to put this painting to good use... and one frustrated afternoon,I grabbed a swab of black paint and wrote a quote over it in BIG BOLD LETTERS.... I completely ruined the stuff... Although the quote goes as follows "Things are never quite as scary when you have a best friend"...  it was a scary piece of work... ha haa... I know its sounds familiar isn't it - the quote. Yes it from Bill Waterson's Calvin & Hobbes comics... I simply loves those too... My fav... I always end up laughing at the same joke that I have read over a hundred times...
Well My Canvas...yeah.... My hubby came home in the evening and there it was right in front of him in the hall a not so great painting destroyed by quote that was painted over it soo badly.... He was very unhappy.... If this is called ART... he said you shouldn't be drawing.... ehhh .... that was you know made me feel bad....
Well so my next thought was what to do next.... One fine evening we dropped by a art shop and picked up a cobalt blue paint and metallic blue spray paint. I have never worked with spray paint before. I had already experimented so much on this particular canvas that I didn't bother to ruin it once again. So i got down to work next day in search of a perfect set of leaves which would be my inspiration to the next new painting.....
I found them right around my house. and this is what i ended up with .... follow along and let me how you like it... do you think the first painting was a better one??? let me know...
when the quote goes behind a layer of paint 


When my baby's stroller becomes my leaf carrier
The final product !
a closer look


On the request of friend Just added how to get this done on your own. Its a simple 3 step process and you are done !

Done !!!

Sunday, June 17, 2012

Random Vibes !

Inspired by Wendy at Living Creatively I drew this... Random Vibes !!!
Its only now I realised there are sooo many things in and around you which deserve to be drawn.... Works of art hidden in everything...from a door knob to a ragged piece of fabric... One just needs to open up to appreciate them... Once you do that you'll begin to see everything around you in a new light... It'll make you happy...

line drawing

modern art

line drawing

pen art


Signing off with a thought that's so very true


Wednesday, May 30, 2012

Pillow Case to Sewing Machine Cover

Today I'll be sharing with you the story of how an old pillowcase cover turned into a sewing machine cover which will protect my sewing machine from all the dust.

Pillowcase sewing machine cover

It's just another example of how a virtually useless item can turn into something beautiful. I found an pillowcase in my stash. It was old and I just couldn't think if anything to make out of it. That's when I thought I could just try out a few things on it that I have never done before.
Like making Fabric flowers.
 I saw these fabric flowers in MakeIt-LoveIt and decided to do that. Ashely has explained it very well. Cut out circular pieces of cloth. For 1 flower you'll need 4 circular pieces of the same size. Fold each of these circles into a cone and squeeze in the centre. Thus U'll have a smaller and bigger circle. Similarly make the rest of the petals. As you do these, pin them on the fabric to make the flower. stitch concentric circles or spiral to secure them in place.


Yet another day I wondered if embroidery could be done with an ordinary machine. I observed a few cloths and saw they were mostly zig zag stiches. So I set my machine to a stitch length of 2 . Wrote the word "Sew" on the fabric and ran a zig zag over it.


Once I finished this I realised it could become a good sewing machine cover. Decided to make use of the decorative stitches on my machine to give it a simple border


Then I placed it over mine machine and marked the places where the thread poles lie. Cut out 2 circles , so that the thread can remain in place when I cover my machine and loo... Machine cover ready !

Isn't it amazing how simple things can virtually change a useless scrap of fabric to something useful !


Follow my blog with Bloglovin

Wednesday, May 23, 2012

Pinterest Love !

I heard of pinterest only recently. I know It'll be a little hard to believe that... But yes thats the truth...
But I must tell you... I have completely fallen for it. I have been spending so much of time on it. Discovering some wonderful things made by some wonderful people.
Check out my pinterest board to see all the lovely stuff I have repinned. I intend to make a lotttt of them !
It's bubbling with ideas...
                    http://pinterest.com/nichu123/
If you like my boards don't forget to click on the Follow Me On Pinterest button on the right sidebar !

And guess what... I already made one of things I saw...
A Newspaper Basket !


 Ehh... I know the pics are not great... Need to take few more in better lighting...

Also there's news... Richu touched his legs with his hands for the very first time today !

I guess he loves the camera... Every time I bring out the camera to snap a photo of him... He kinds of stops doing whatever he was doing and just blankly stares at the camera... I had to hold the camera real still for quite some time before I could snap this pic.


Sunday, May 20, 2012

A Day in my Life !

It was a beautiful day ! Took some time off. Spend some time wandering in the open...That's when it struck me I should try something different today - Photography.... I keep seeing all these fancy photographs on the net ... so I decided I should try some too... So I shot some self portraits ... used some photo editing software....and here is the result...

A reminder of the longg list of TODO's for the day !


Feeling reallly really happy when I got all the items ticked away !


Cooking something new has become my new best hobby


The Best part !!! playing with my young one.... I just love him sooo much 


Don't u loveee that expression... hahhaaaa.... " Ehhh... u have kissed me a lottt today ...Not again !"
I guess that's what he's trying to say :)


Wednesday, May 16, 2012

Wall Hanging using craft paper

Like a year ago I made this wall hanging using craft paper. I didn't have a blog then else you would have had the detailed steps as to how I made this. Well you don't have to be disappointed because I am in the process of making something similar to this. Of course with the steps ! :)

Here's how the older one looks like.... I simply loved them...

Jungle
The Elephant
The Giraffe

The King of the Jungle


You'll need the following to make these...
Cardboard
Craft paper
Wool
Thermocol balls

Draw your jungle animals on the cardboard. Cut them out. paste the craft paper. A Black outline for the animals gives them a certain charm. I used wool to give that outline. Also for the hair of the lion I used wool. Didn't cut out the individual pieces just looped it and stuck it with glue !
Finally make small holes on each of the animals and thread wool thru them . Don't forget to thread your thermocol balls on the way. I basically attached the wool to a needle and threaded through the balls.

To give additional support to the wool, attach cellophane tape behind the knots.

Do let me how you like my cute jungle animals ! :) Also stay tuned for the next project.


Related Posts Plugin for WordPress, Blogger...